
In this tutorial you will learn how to create a fire animation inside Maya, and adjust the settings for your own projects. We will create the fire from scratch using Maya Dynamics and Fluids. The fire animation we will create can be rendered using both Maya software and Mental Ray.
Final Effect Preview
Click on the image to open a High-Rez version.

Step 1
Open the scene you are going to use. I created a scene with a lighter, some lights and a white background.
Step 2
Make sure the “Dynamics” menu is active, and then go to “Fluid Effects > Create 3D Container with Emitter”. Position and scale the container to match your scene.
Step 3
Select the container you just created, and then go to its attributes (make sure you are looking at the “fluidShape2” attributes).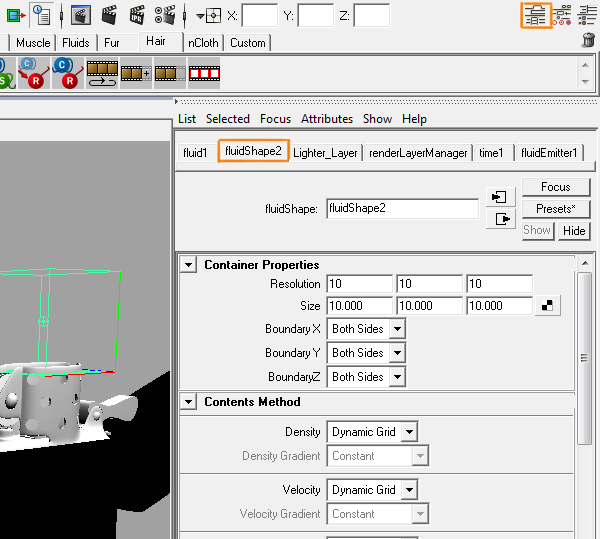
Step 4
You are going to leave the resolution at a very low number for now. Change the following options under "Container Properties".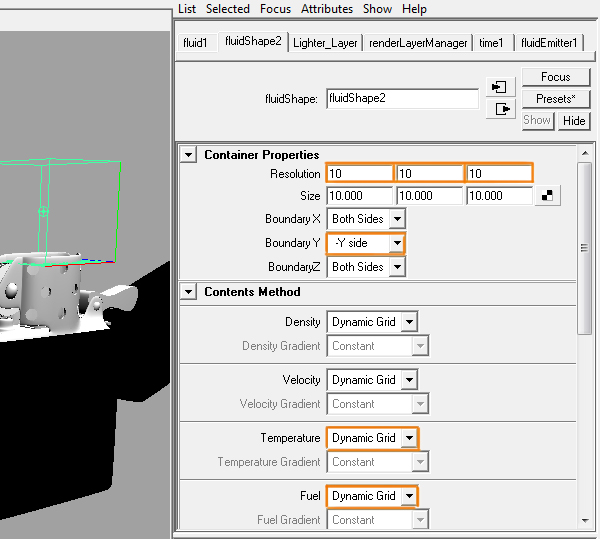
Step 5
Select only the emitter and move it down with the move tool.
Step 6
Increase the number of frames. Do a playback to see how the animation of the flame is looking.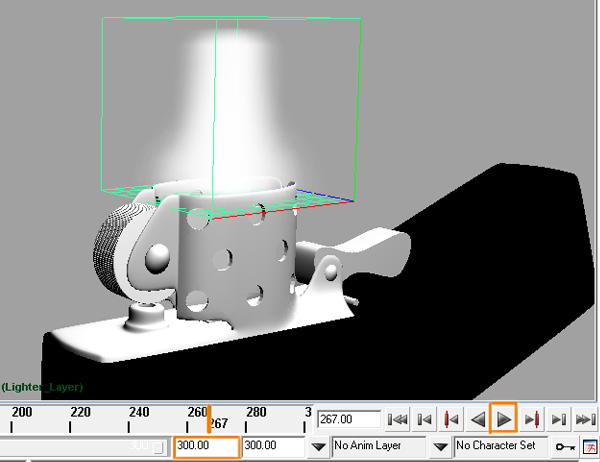
Step 7
Select the container, and under the “fluidEmitter1” attributes, change the following options: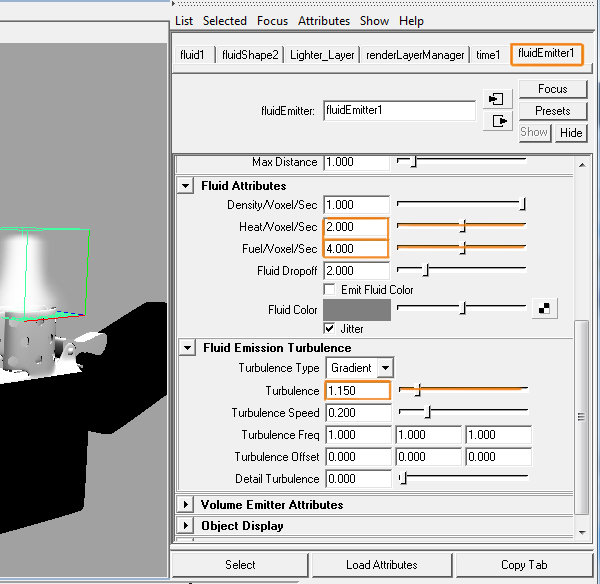
Step 8
Go to the “fluidShape2” attributes and change the following options:
Step 9
Inside the “fluidShape2” attributes, change the following options under the “Contents Details” section:
Step 10
If you do a playback of the fire you should see the fire reaching the top of the container and creating an undesirable effect. To fix this, you need to increase the size of the container.
Step 11
Go to “Fluid Effects > Extend Fluid” open the settings of that tool, and then change the “Extend Y by:” to '2' and click on “Apply and Close”.
Step 12
Now the fire has more space to move.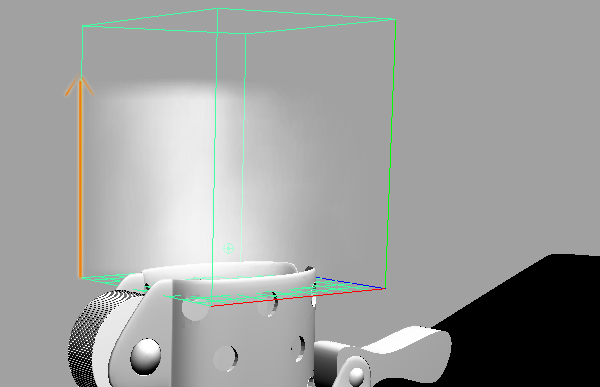
Step 13
Select the container, and under the “fluidShape2” attributes, change the following options:
Step 14
Scroll down to the "Shading" section and change the following options: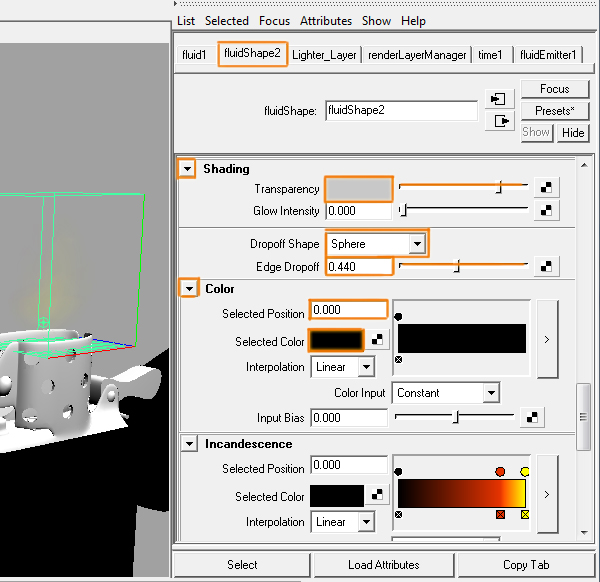
Step 15
Scroll down to the “Incandescence” section, and change the graph as shown on the image.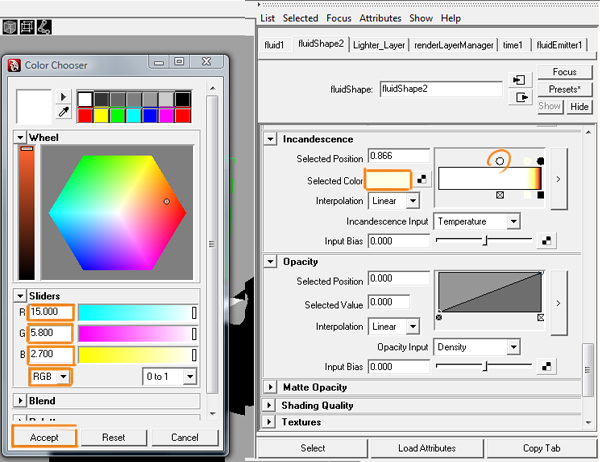
Step 16
Go to the Opacity graph and change it as shown in the image. Then modify the following options: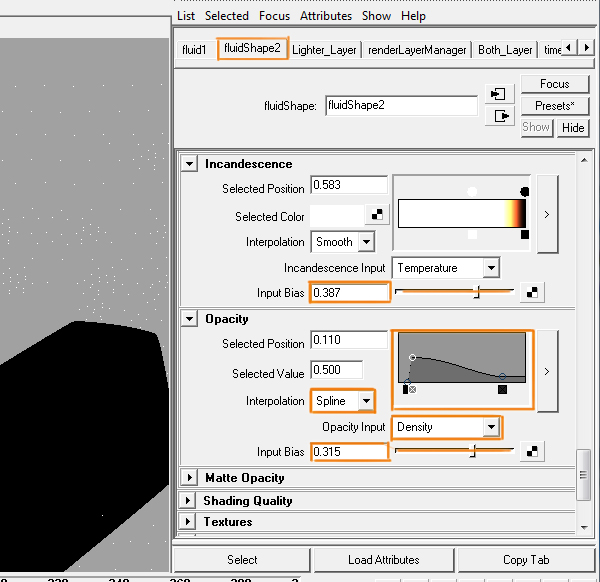
Step 17
If you do a playback of the fire, you should see a nice looking animation.
Step 18
If you render the scene, you should see that the fire looks good now too.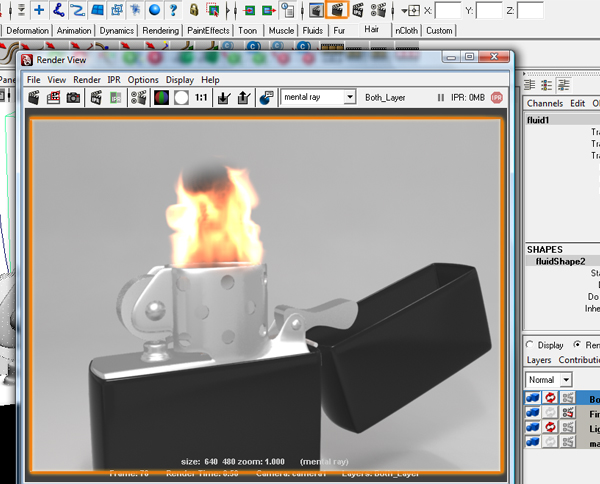
Step 19
If you want to modify the "Brightness" intensity of the fire, go to the “fluidShape2” attributes, and under the “Incandescence” section, change the “Input Bias” to a value that works for you.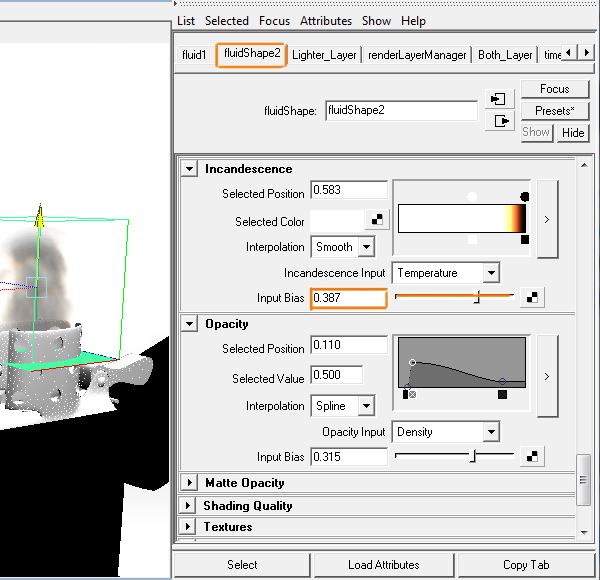
Step 20
I used Mental Ray to render the fire, but you can change it to Maya by going to the “Render Settings” menu, and at the top of the window, change “Render Using” to Maya Software.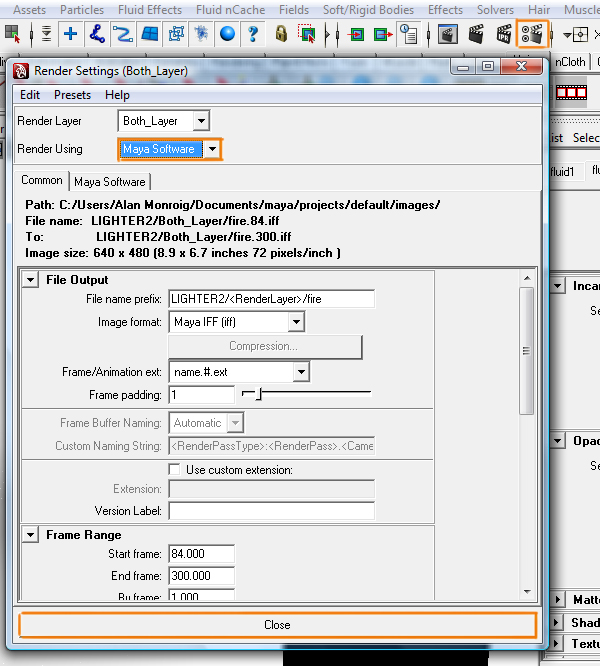
Step 21
If you render the scene it should still looks pretty great, but all of the objects in my scene disappeared (except for the fire) because they all have mental ray materials.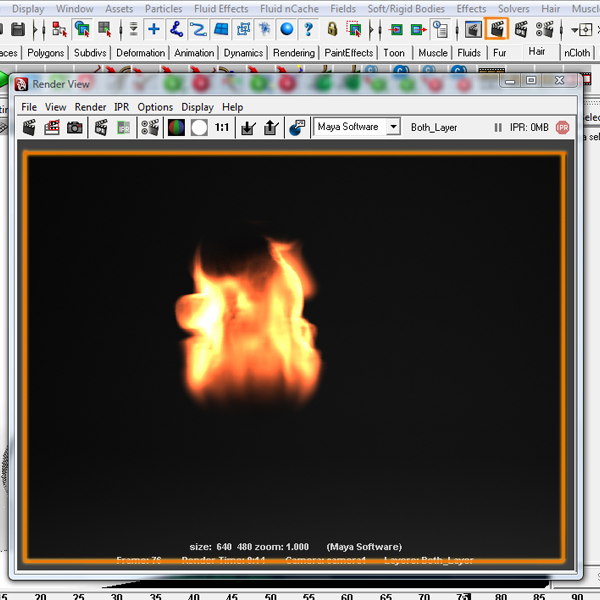
Step 22
Lastly, if you go to the “Attributes” of the container, you can use one of the other cool presets that Maya has built in.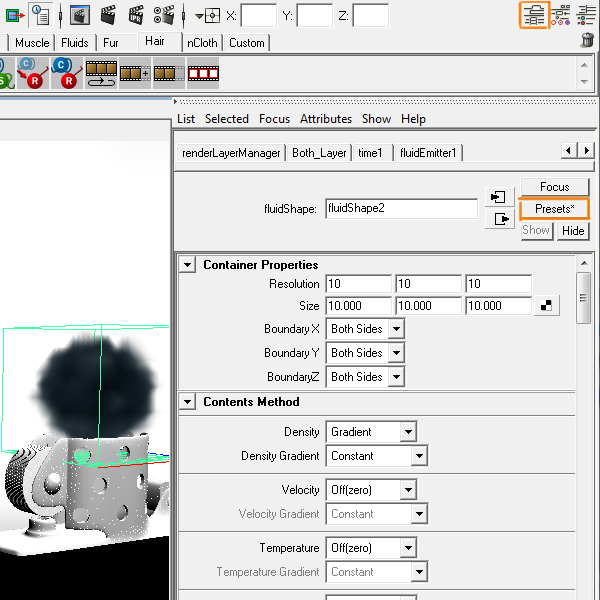
Step 23
The image below was created using the “thickcloudPuff” preset.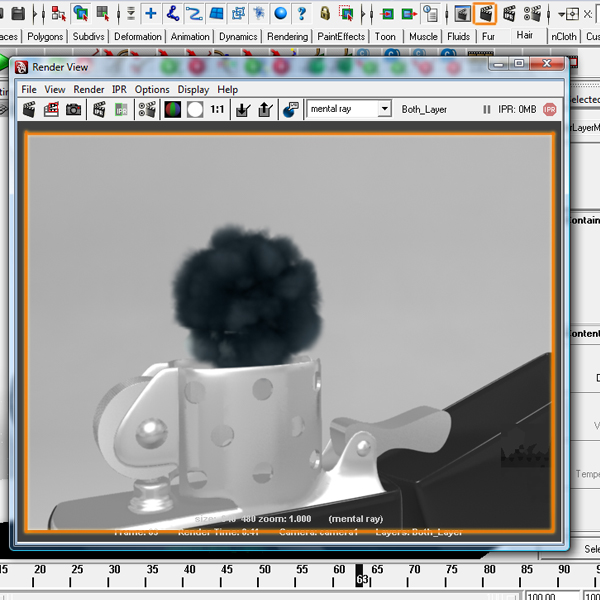

1 comment:
wow this fire maya tutorial was amazing
Post a Comment