1. Document Setup
Switch instantly to document size and unit preferences by using Command + Alt + P.
2. Paste in Back (Command + B).
This command is useful when you try to give a drop shadow effect to a text or an object. Generally we paste in front, and then send it back. Next time, use Command + B to paste in back directly; and assign a dark color for the shadow.3. Quick Spell check
While working with the text objects, you can check the spelling instantly by pressing Command + I. This saves you time from opening a text editor and checking the text for spelling.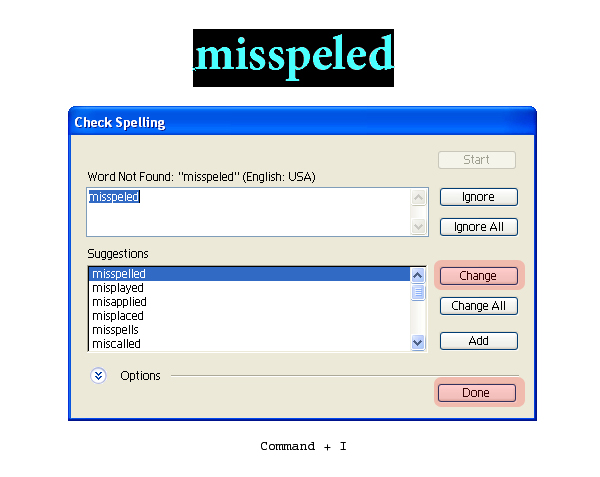
4. Hide/Unhide Objects
For messy artwork with lot of objects, hide unwanted objects by using Command + 3. Unhide all using Command + Alt + 3. This is similar to Lock/Unlock with invisibility.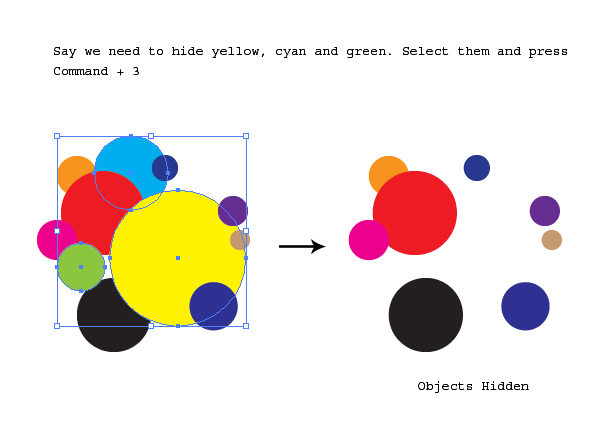
5. Lock/Unlock
Avoid accidental dragging of objects by locking them using Command + 2. Unlock them all using Command + Alt + 26. Threaded Text
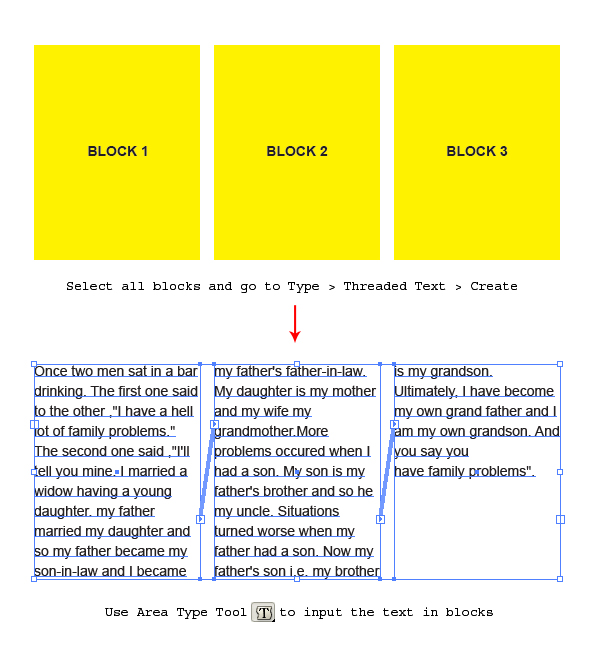
While creating brochures, manage the bulk of text in different blocks by using threaded text. It adjusts the text flow in all blocks/columns as you append or modify it. To achieve this, make the block shapes, select them all and go to Type > Threaded Text > Create. You can use the Area Type Tool to feed the text inside.You can show/hide those messy text threads using Command + Shift + Y.
7. Change Case
This option is useful when you want the entire text in upper, lower, title or sentence case. Select the text and go to Type > Change Case. Assign the case you want.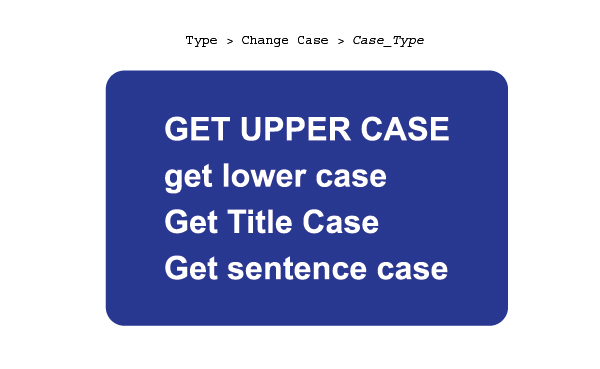
8. Show Hidden Characters
This command shows the returns and spaces in a text block so that you know if you have placed multiple returns by mistake, and are not able to see due to uneven line height of the text block. Select the text body and go to Type > Show Hidden Characters (Alt + Command + I)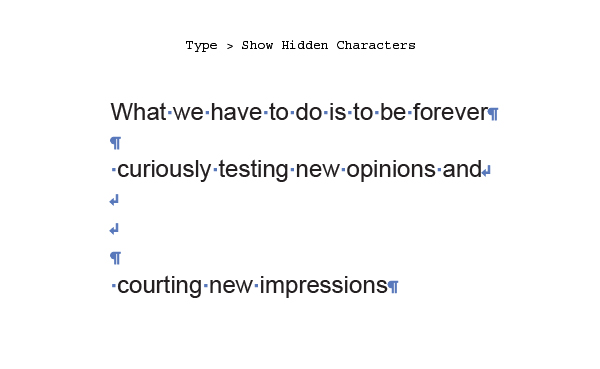
9. Hanging Punctuation
Use Roman Hanging Punctuation and Optical Margin Alignment for better appearance of text blocks with quotes and hyphens. For Roman hanging Punctuation; Select the text lines or block and select Roman Hanging Punctuation from the Paragraph panel menu.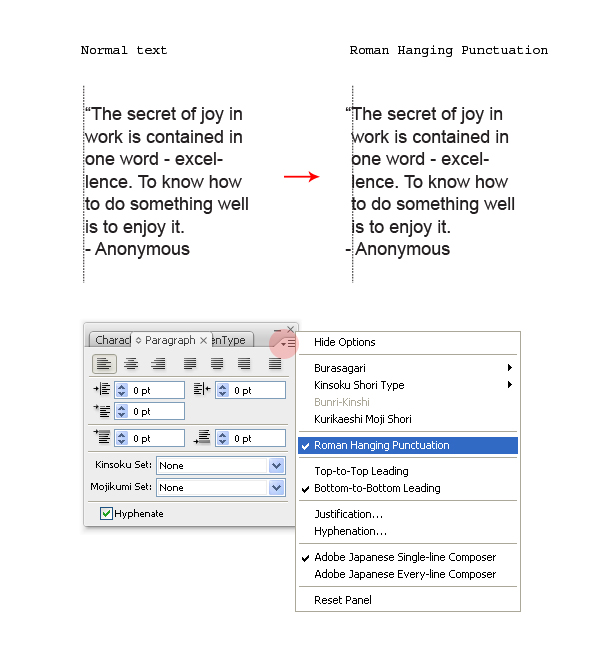
10. Show/Hide Bounding Box
When the objects are too small, say 2px size; it becomes annoying when you try to drag them with the selection tool; just because of the bounding box that forces you to scale or rotate the object. You can instantly hide the bounding box using Command + Shift + B and toggle using the same command.
11. Zoom for 3-D objects
While zooming in or out for 3D objects, it takes a lot of time if you do this operation with Command ++ or Command--. Instead, you can use the zoom level located at the lower-left corner of the main window. Say, you want to switch from 30% to 400% in one step. Here, the zoom level will really help instead of Command++ where you have to zoom 8 times to reach from 30% to 400%.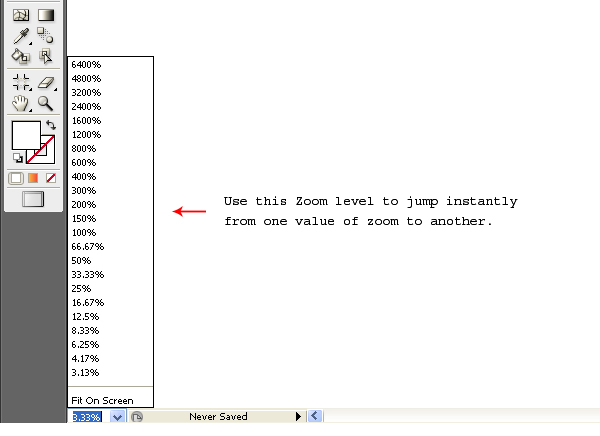
12. Toggle Between Stroke and Fill color
Use "X" to toggle between Stroke and Fill. Use Shift + X to swap the Stroke and Fill color.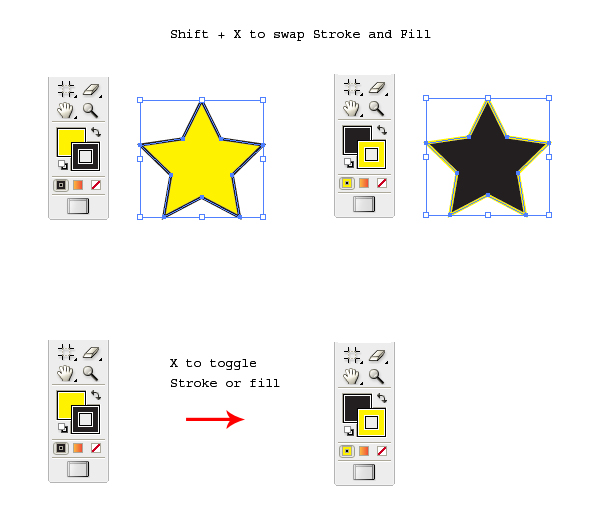
13. Create Crop Marks
Crop marks helps you identify where you want the printed work to cut or trim. To apply, select the object and go to Filter > Create > Crop Marks.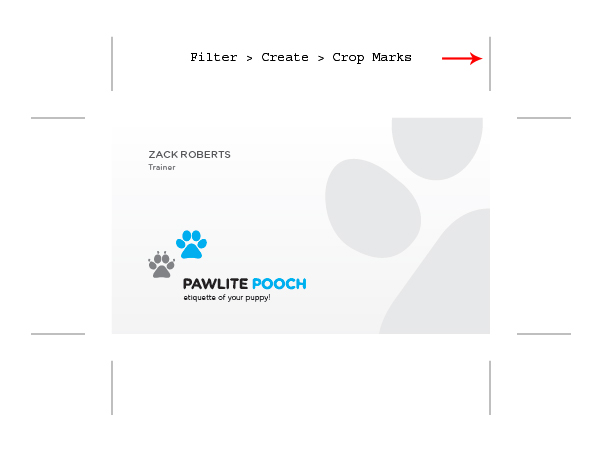
14. Customize Smart Guides
Smart Guides help you snap, align, create and edit objects relative to other objects. Use Command + U to enable Smart Guides. You can customize the snapping angle of your choice using Edit > Preferences > Smart Guides & Slices. In the Custom Angle option, specify the angles of your choice. This option is revolutionary when you are working with perspective.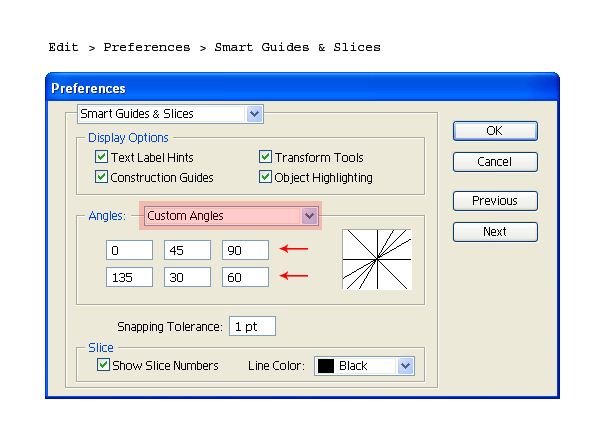
15. Managing Views
This is extremely helpful when you are creating a Map diagram of fairly large size. Say, we are illustrating a World Map and want to switch the view from Japan to South Africa instantly. Generally, we will drag the entire art work with hand tool until we reach our destination.Instead, save these views with different names using View > New View option. So that, next time when you want to switch over to South Africa, just click View > South Africa. This works similar to a navigator.
16. Appearance of Black
We all are familiar with Rich Black and Normal Black. By default, Illustrator displays and outputs all black as rich Black. If you want to clearly differentiate Rich and Normal black for screen view and for printing, use Edit > Preferences > Appearance of Black. Select “Display all blacks accurately” from the dialog box. Next time, you will see Rich as Rich and Normal as Normal.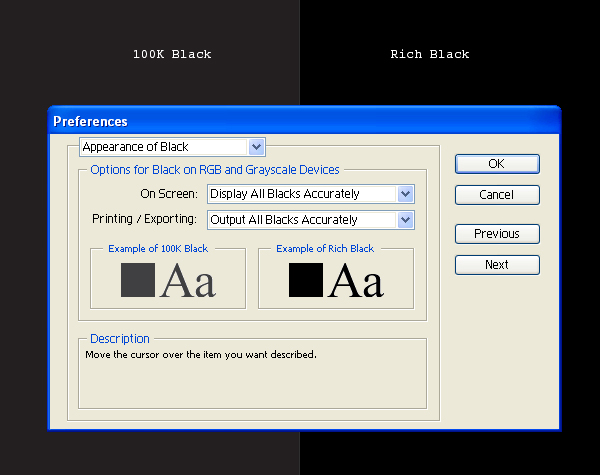
17. Replace Spine
You can tween blended objects on customized paths using Replace Spine option. To apply, select the blended result along with the spine path and go to Object > Blend > Replace Spine. The blended objects will tween along the spine locus.
18. Save Selection
This option is helpful when you want the objects to be moved together, but also need the freedom to modify them separately. For this, select the objects and got to Select > Save Selection. Next time, just click on Select > Selection_name and all your desired objects will be selected.19. Support for Arabic Languages
Although, Illustrator has got Asian Language support, sometimes a US based Illustrator version might not display Arabic language correctly. For this, type the desired Arabic text in Inkscape and export the converted paths as .eps files to Illustrator.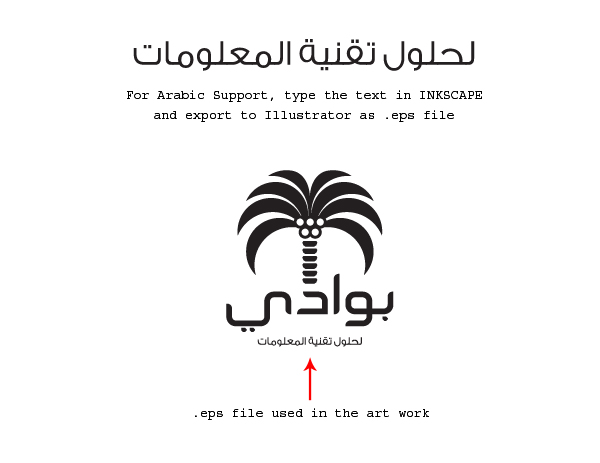
20. Switching from Illustrator to Corel Draw
Sometimes Corel Draw doesn’t allow us to import .AI files due to some missing plug-ins. In such case, export your artwork as .WMF (Windows Meta file) from Illustrator. Before exporting a .WMF file, enlarge your artwork to almost 1200% larger size. After successful import in Corel, again resize it back to the original size.This is done for a reason; the small objects with fine curves are treated as distorted polygonal shapes in the output. So, it will be good if the size of the objects is fairly large while exporting. The .WMF files containing gradients are rasterized while importing in Corel; so remove the gradients while exporting. You can re-color them in Corel Draw.


No comments:
Post a Comment